My aim is to recycle aluminium and turn it into objects, using the lost foam casting technique, and a DIY furnace.
The original plan was just to develop some ideas for lost foam casting, and then use these instructions to take to a local furnace, but after some initial information gathering, I found that there we a big backyard casting movement, and the construction of a small furnace was feesible and perfect for small objects.
For the last two days I have been constructing a Flowerpot furnace. Here is how I have done it:

Here are the main ingredients. The idea is that there is a container (a paint tin is suggested, but I have used a bucket, as I wanted an option to smelt more material!)that contains the flowerpot which is insulated by concrete or cement. There is a removable lid with a vent through the top, and air is injected (blast) into the furnace to attain the correct working temperature.
I have decided to try and make my own refractory concrete to stand a higher heat and hopefully prevent cracking and early wear.
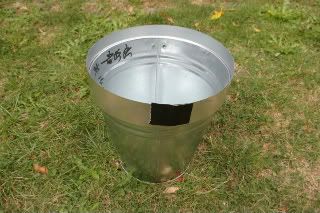
I bought some 0.5mm aluminium form the DIY store. I have wrapped this around the edge of the bucket to for the lid. This was taped by some hi-bond 3m tape that I had lying around, but you could rivet or glue.
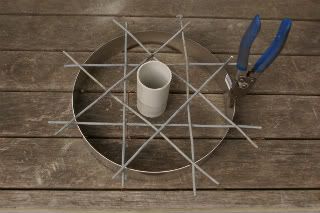
Here is the lid laid out with some 3mm steel rod as a reinforcing. The PVC pipe in the centre will form the hollow core of the lid, and I have coated this in a release agent (vaseline) to get it out after the concrete is set.
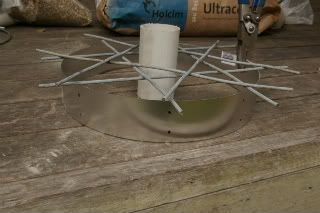
another view.
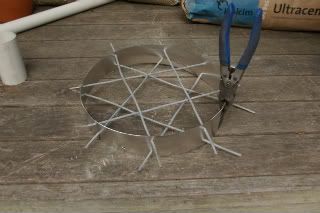
Here is the lid after is has been drilled and the wire inserted. it is basically 2 squares offset. The lid is 50mm deep, and is the two wire squares are inset 15mm from each edge.
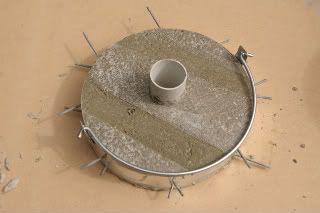
Here is the lid with the refractory contained. I made my own refractory from a mixture of vermiculite (from a local pottery suppliers), cement, lime and sand. There are some recipes on line for clay ovens, which I have tried to emulate, but without some of the more specialised product (like alumina cement) so I have had to improvise, and we'll see how it goes! The lines on the top of the lid are from the timber is used to weight the lid down as it was warping.
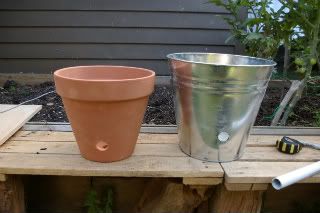
Today I have been drilling holes in the bucket and flowerpot. The bucket was easy - the flowerpot was a pain. I was using a rotary tool, and s series of grind wheels did nothing really. I eventually used a small diamond tip tile tool, but the head was so small that this process must have taken 1 1/2 hours :-(
I made sure everything lined up, and then began to fill the gap between the bucket and flowerpot with some more of the refractory. This was an absolute pain - as the flowerpot was really tight to the bucket, and it was almost impossible to vibrate the refractory down the gap. I had to mould the refractory around the outside of the bucket and force the flowerpot in. The problem evolved of the flowerpot being too proud of the hole, which I eventually resolved, but it is still slightly to high, with the steel tube being forced down and out of the bucket at an angle. This I will try and resolve tomorrow.
It was at this point an almighty row broke out with the cat engaging in a brawl with a local tabby twice her size. Typically, she was beaten up and hobbling, so I had to take her to the vet for painkillers and antibiotics. Perfect timing!
Tomorrow I will be trimming the reinforcement from the lid and doing some general tidying up. I am going to start to run some heat through the set up over the weekend, with a first proper firing on Sunday.
I have trawled the internet, took different set ups and adapted them, but basically done a bit of guessing also.
Here are some of the sites that I have used as reference, which are interesting and useful in their own right,here, here and here.
Disclaimer: This is a DIY project and Chris Jackson takes no responsibility for any injury,accident, loss or damage should you choose to engage in a similar project after reading this blog. In this, or any similar project, due care and diligence should be taken and always wear the proper safety equipment and take relevant precautions. If in doubt consult an expert or trades person.
No comments:
Post a Comment